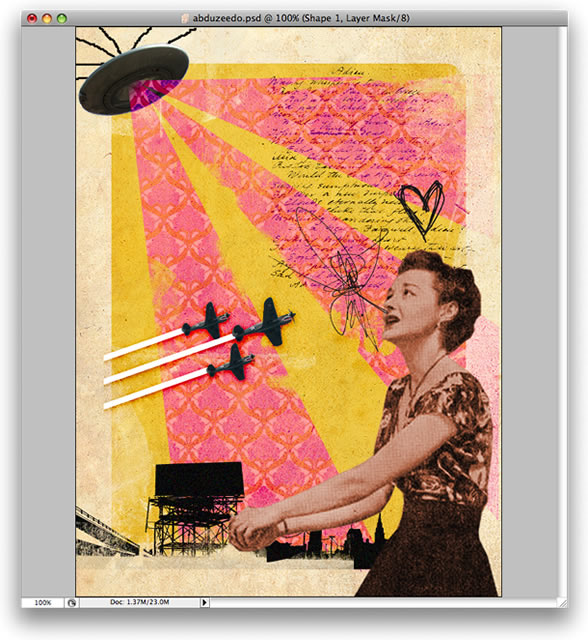
Step 1
The first thing to do is plan your design so you will have to have an idea of what you want to show with your image. It's best to draw some concepts—it's faster to do some sketches than to go straight to the computer (even though I am a terrible drawer)!

Step 2
With some drawings and ideas in mind, it's time to go to the computer. Go to Photoshop and create a new document. Set the size to 600 x 800 pixels.
Step 3
Find some old paper. I used a Creative Commons–licensed image from Flickr. That's going to be our background. Open the image in Photoshop and copy it to your design document. Resize it and change the opacity to 60%. Just make sure that your background is white.
Step 4
Choose the Rounded Rectangle Tool (U) and create a rounded rectangle with a dark yellow color like I did.

Step 5
Create a Layer Mask (Layer>Layer Mask>Reveal All). After that, select the Brush Tool. Set the color to black and use some brushes to erase parts of the yellow rectangle. I used brushes from the "Grunge Brushes by Ardcor" and "BB Watercolor II" packs.

Step 6
Next, I found a Creative Commons–licensed image of a flying saucer from Flickr. In my UFO file, I just selected the spaceship, then cut and pasted it in my design. After that, using the Pencil Tool with brush size of 2 pixels, just draw some lines like I did.

Step 7
Next I'll search for vintage ads. You can use Flickr, searching for Creative Commons–licensed photos, or stock photography sites like iStockphoto. Once I found my image, I cut the lady out using the Magnetic Lasso Tool (L) and pasted her into my design.

Step 8
Convert the lady's layer to Smart Objects and apply a Smart Sharpen. If you are using the CS2 or lower version, just apply the filter.

Step 9
Next you'll need an image of handwritten text. You can either make one yourself and scan it or search for one as described above. Once you find a good one, just copy it to your design. Make sure that the image has a white background, then just change the Blend Mode to Multiply.
Next we can add some vectors. I used some from a free Go Media Vector pack that you can get here.

Step 10
Now using the Pen Tool (P), create three triangles as shown below. For my design, that will give the idea of abduction.

Step 11
After you have the three black shapes, change the Layer Styles.
- In Advanced Blending, set the Fill Opacity to 0%
- In Color Overlay, choose a pink for the color and set the Blend Mode to Color Burn
- Using those brushes again, repeat the Step 5 and erase some parts of the shapes to make them look very old

Step 12
To give it more of that vintage look, you can add some patterns to your image. You can find lots of patterns on stock sites. One site that's really cool is http://www.missjo.com.au/. They sell amazing vector patterns for a very good price. You can create your own pattern as shown below.

Step 13
Now you can add more elements. I added a city skyline, and using some brushes I deleted some parts of it like in Step 5.

Step 14
Again, add more elements of your choice. I added a plane to my design.
- Extract just the plane from the image and paste it in the design,
- Rotate the plane so it looks like it's going up 309º. Try to hold Shift while you are rotating it.
- Using the Rectangle Tool, choose white and create a rectangle. Rotate it to 309º, the same as the plane.
- Duplicate the white rectangle, change the color to a dark grey, and flip it vertically (Edit>Transform>Flip Vertical).
- Create Layer Masks to refine the edges of the both rectangles in order to give a perspective.

Step 15
Repeat step 14 two more times and that's it. You will have three airplanes.


